April 30, 2012

Photo Cards How -To

My sister was telling me about a great idea to help babies/toddlers recognize family members, animals, objects whatever you would like.  They are kind of like flash cards but with photographs and they can stick to the refrigerator.  I thought it would be a great way for my little one to become familiar with her family members.  I call them photo cards but you can call them what you like.  I made one for each person in our family (grandparents, aunts, uncles, etc.).  You can make them for anything you would like your child to recognize and become familiar with as long as you have a picture of it.  The great thing about this is that you can use things you already have at home!  Heres how I did it:
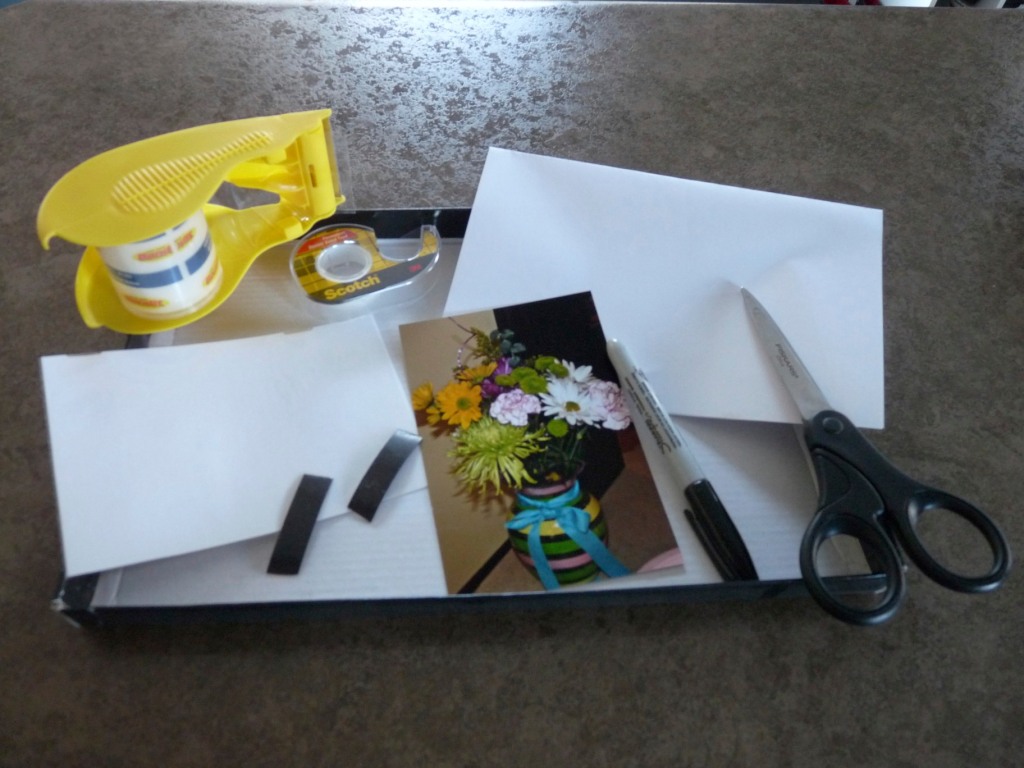
Materials:
Photos (magazines, newspaper, whatever photos you want your child to recognize)
Old photo album (I cut the individual pictures sleeves out of an old photo album)
Cardboard
Scissors
Paper
Marker/pen
Doubled sided tape
Magnetic Tape (the magnet strips that are sticky on one side, I got mine at Untied Art & Education, but I'm sure you can get them almost anywhere)
Clear packaging tape (optional)
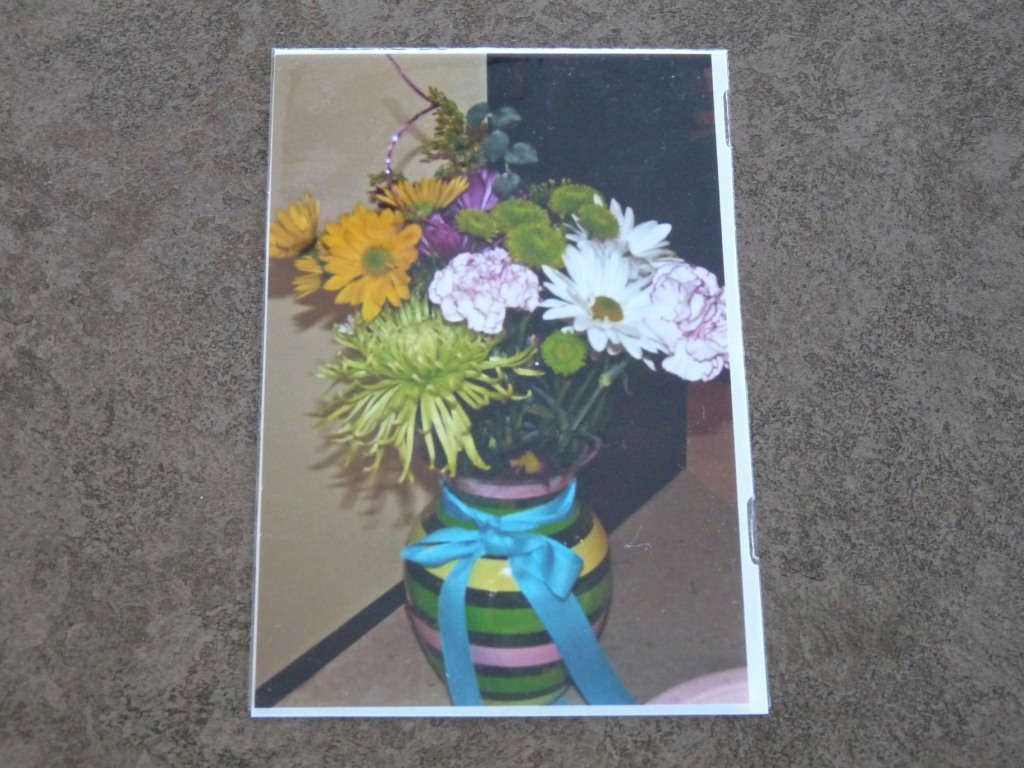
Once you have all of your materials together you can start.  I took the photo sleeves out of an old photo album and cut them so were individual  photo pockets.  Put your picture in one side of the photo pocket.
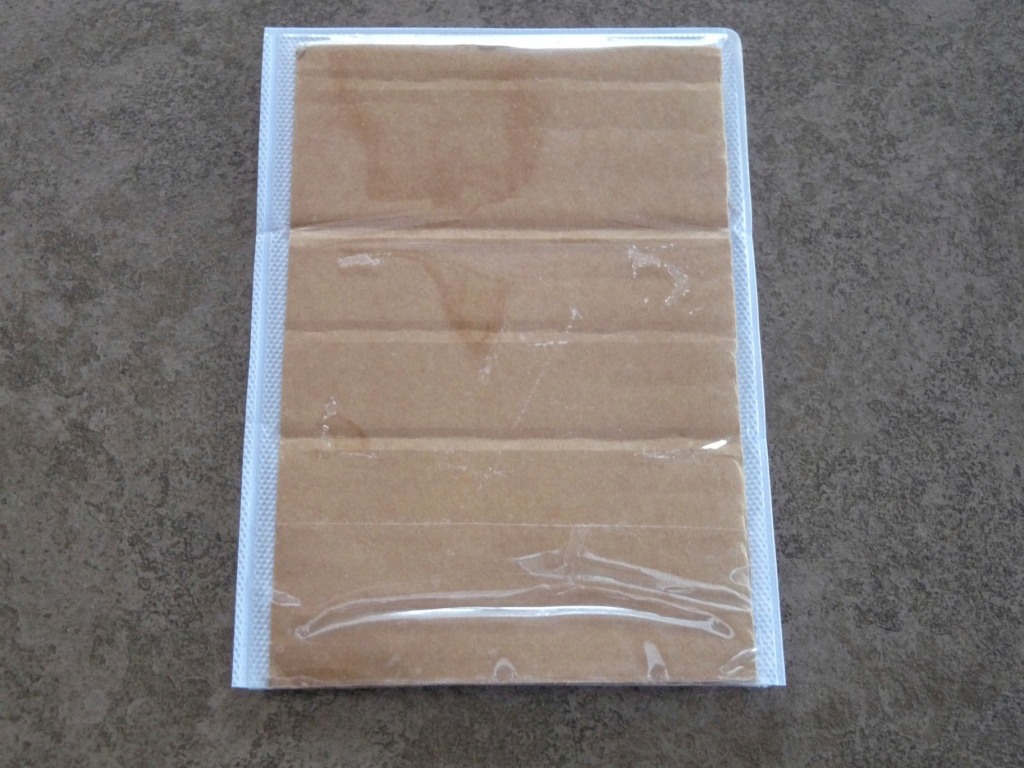
Take your cardboard and cut it little smaller than the size of your picture.  My picture is a 4x6 so I cut my cardboard to 3 3/4x 5 3/4.  Once your cardboard is cut you can put it into the other side of the photo pocket.
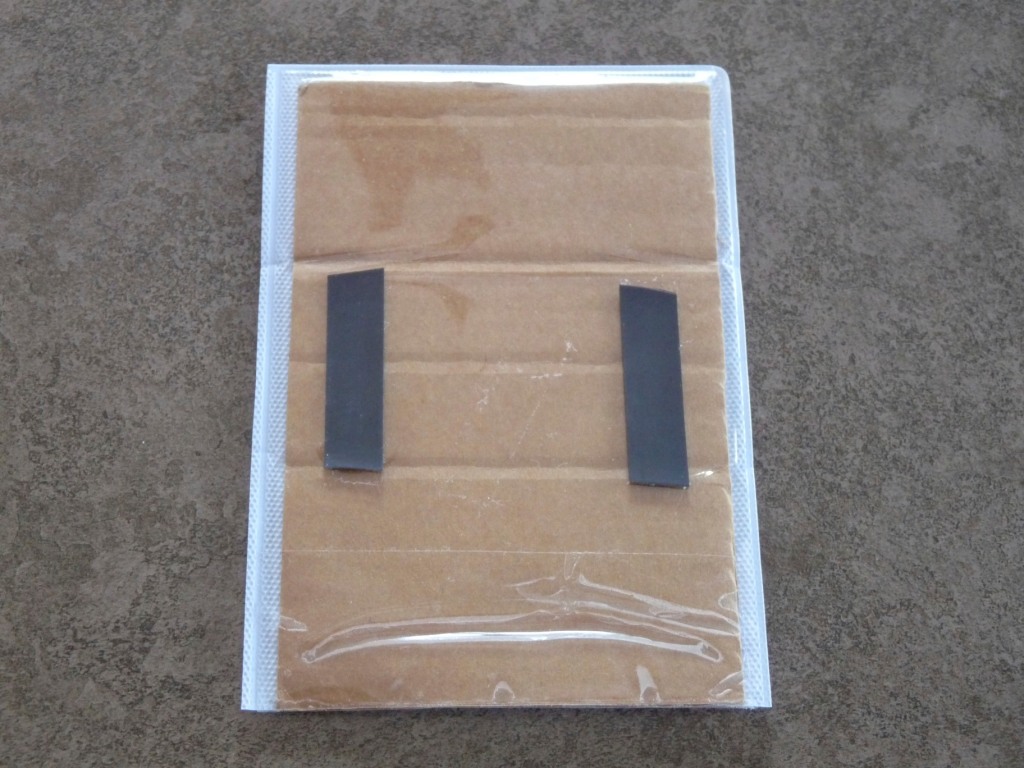
Now take you magnetic tape and cut 2 two-inch pieces.  Stick the magnetic tape on the cardboard side of the photo pocket.
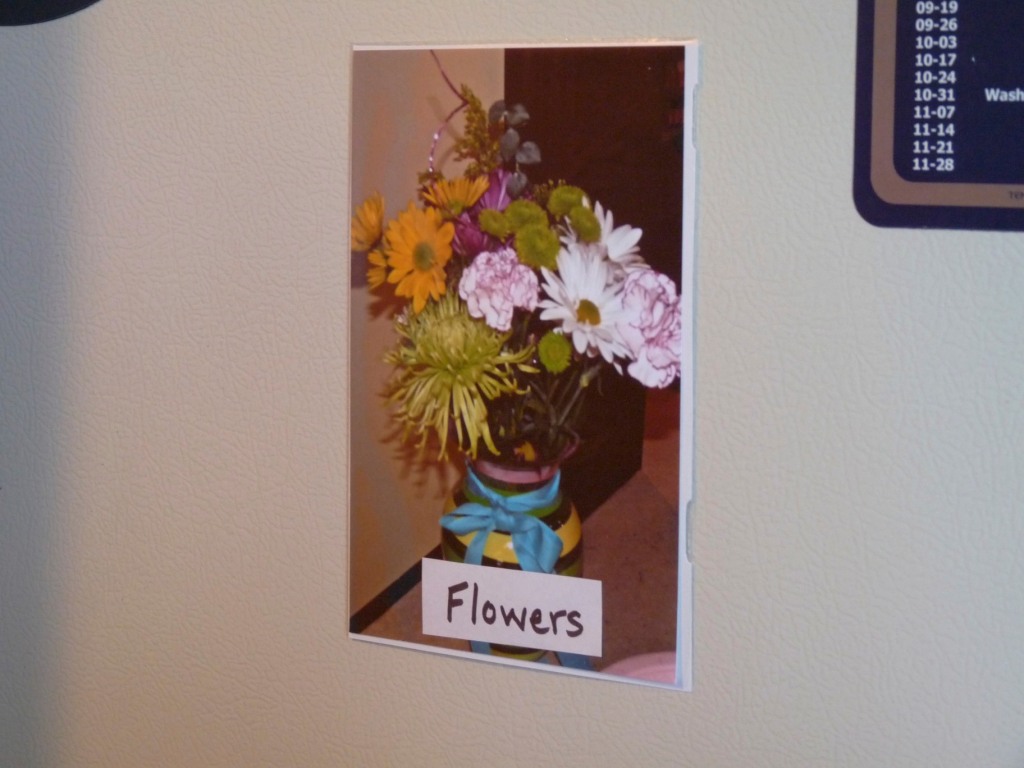
Now your photo card is complete.  There are some optional things you may want to add to your photo cards.  I decided to write the name of the picture so little ones could see the word and become familiar with it.  For this picture I wrote Flowers on paper in marker and cut it out.  Then I used my doubled sided tape and stuck one side of the tape on top of the word Flowers.  Now the other sticky side of the tape can be stuck on the inside of the photo pocket in front of the picture!
The other thing I did was I used clear packaging tape to seal the open side of the photo pocket.  I wanted to make sure the picture and cardboard wouldn't be taken out by little hands!
Then you can stick it to your refrigerator and the little ones can pull them off and put them on all the while learning and familiarizing themselves with family members, objects, animals, etc.
So there it is a photo card how-to.  I hope it makes sense and is helpful to you!  Happy making!
April 25, 2012

Freezing Cookie Dough

My family likes to have cookies once in awhile but when I make them, the 3 of us can never eat them all.  Then I remembered that a friend had mentioned freezing her cookies after they cooled.  Well I decided to change that idea a little because I only like cookies right out of the oven.  When I make cookies, I bake 6 (2 each) and then continue to ball the rest of the dough into the correct portion and put them in a freezer bag.  On the bag I write the temperature and the amount of time to bake them (I add 2 minutes due to them being frozen) and put them in the freezer.  So, whenever we feel like a cookie I grab a few out of the freezer and throw them in the oven.
I also use parchment paper on my cookie sheets so I don’t have to wash the pan!  That makes baking cookies so much more enjoyable.  Parchment paper is expensive, but I wait until I find a coupon in the newspaper before I buy it.  Then I cut it to just fit my sheet, when I am done using it, I fold it up and use it again for the next batch of cookies.  I read that you can reuse it a few times; I use it no more than 3 times.  That way I feel like I am getting my money out of it.
One more cookie tip, if you like warm cookies like me, I put non-warm cookies in the microwave for 11 seconds (some microwaves may very).  Put one or 2 on a napkin toss it in the microwave and yum yum!
-Piper

April 23, 2012

Coat Hooks for Curtain Tie Back Hooks

I made the curtains for our house.  Nothing fancy just simple straight rod pocket curtains.  I usually put the curtains on a tension rod and stick the rod inside the frame of the window.  We open the curtains daily to let in as much light as possible, so I needed curtain tie back hooks to keep the curtains open.  Curtain tie back hooks can be expensive.  A lot of the ones I looked at were too big and gaudy for what I wanted.  I wanted simple and sleek.  So I got the idea to use coat hooks.  They are basically the same thing, coat hooks are just a little smaller.

Here is the curtain hanging down with the coat
hook next to the window frame.

This is the coat hook, pretty nice huh?


Here the curtains are open and being held back
with the coat hooks.
Close up of the curtain and the coat hook!


This is another curtain that I used coat hooks
for the tie back hooks. The hook is to the left
of the window.
Very small coat hook.


Open curtains with coat hooks as tie
back hooks.
Close up of the curtain and coat hook.


For the first 4 pictures (the brown curtains) I don't actually tie back these curtains.  I just have the hooks hold the fabric back. It works great.  I got these hooks at IKEA a few years ago.
In the next 4 pictures, I used silver hooks that I got at Walmart.  They are much smaller than the IKEA hooks.  For these curtains, I do tie them back.  The hooks are too small to hold all of the fabric back.  I took some ribbon that matched my curtains and made a big loop, tied it in a knot, and hooked it around the coat hook.

And there you have it, an inexpensive way to get curtain tie back hooks!

April 20, 2012

Parchment Paper


Parchment Paper...not just for baking.

I do a lot of things with Hot Glue because I love how it sticks to almost everything.  Well, one time I needed something that hot glue would not stick to.  I tried wax paper but the hot glue melted the wax and stuck right to the wax paper.  Then I tried parchment paper and that was the answer!!  You can draw with the hot glue right on the parchment paper and it will peel right off.  Now I keep a piece of parchment paper with my hot glue gun. I use it to catch the glue drips or if my gun falls over, I don't have to worry about it sticking to anything.

April 18, 2012

Flower Photos

I love pictures.  I love looking at them, taking them, and sometimes I don't even mind being in them.  The last few years I developed a love for taking pictures of nature.  Capturing God's beautiful creation is truly amazing.  I don't really know the ins and outs of photography or the technical terms, and I am by no means professional.  I just love taking pictures and I want to share some of them with you!
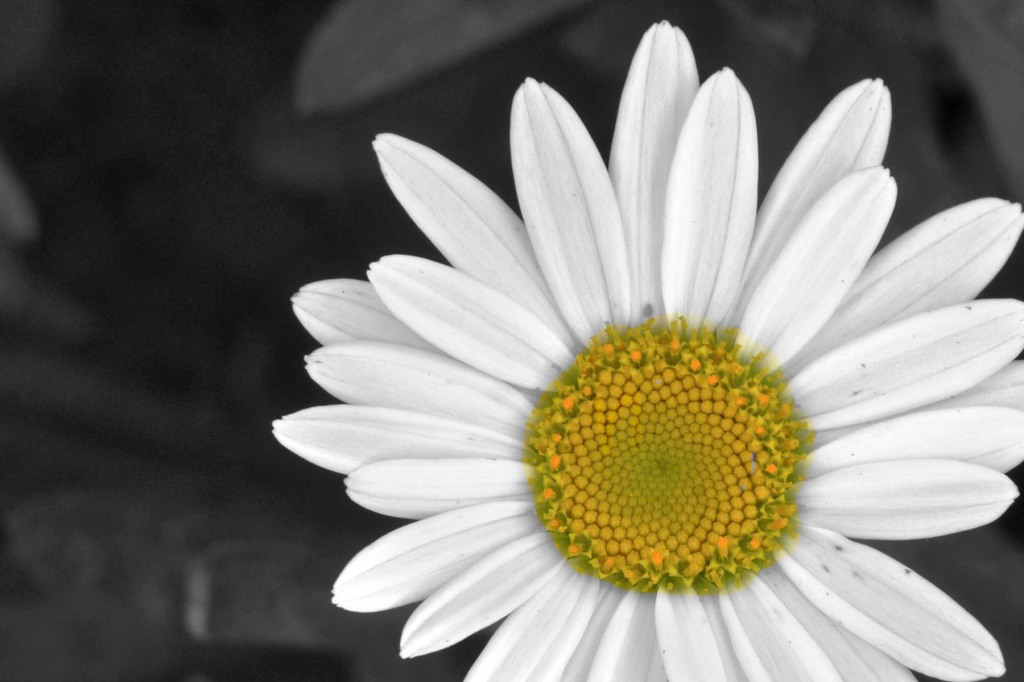
The first picture is a daisy from my own garden.  I think daisies are such a fun happy flower.  This one I decided to make Black & White.
The next picture is the same flower  B&W with yellow center of flower.
The last picture is of a flower called a Zinnia.  I have some beautiful Zinnias in my garden, but this picture was taken at a state park.  I love the amazing detail and color in this one!
The last 2 pictures I have hanging in my kitchen.  They bring such a bright cheerful feel to the kitchen!  I hope you enjoyed them.

April 3, 2012

Mother's Day Gift!

Mother's Day is May 13th, almost a month away.  Do you have a gift for your mother or wife?  Then its time to put in your order for a Custom V & P painting.  What mother or grandmother wouldn't love to have their child or grandchild's drawing transformed into a beautiful work of art?

V& P paintings are hand painted onto the canvas size of your choice.  You get to choose the color scheme for your painting from our wide variety of colors.  When ordering a Custom V & P painting you get to communicate with the artist, via email, to discuss the important details of your painting!
Child's actual drawing
Finished Custom V&P painting
Placing an order is easy, just click on the merrellgirls shop and follow the simple steps.  You will be asked to scan your child's, grandchild's, niece or nephew's original drawing.  Then email it to us with your color choices and canvas size.  Merrellgirls will contact you via email to discuss the details of your painting.  When all the details are finalized, we will begin creating your painting! 


It could take a few weeks before you get your finished painting.  So please order now so you have your painting in time for Mother's Day!


Questions or comments please email us at merrellgirls@gmail.com  

April 1, 2012

Bath Towel Savers


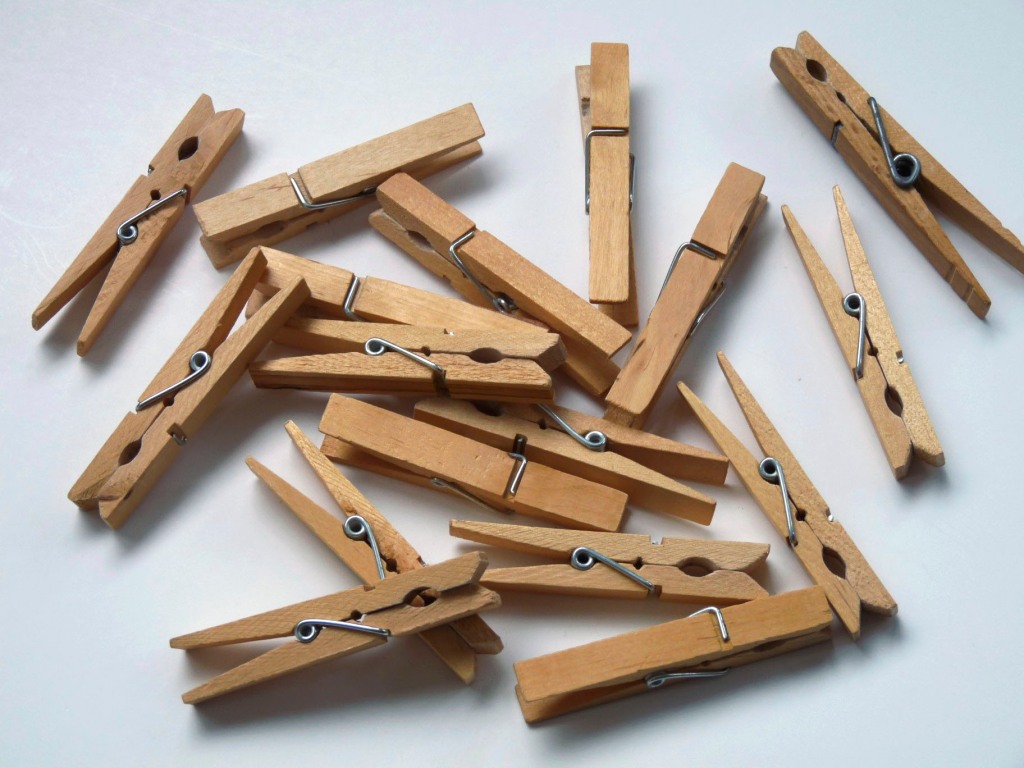
We got the Bath Towel Saver tip from our mom.  Whenever all of us kids and our families get together at our parents for a long weekend or the Holidays, there is always an over abundance of bath towels being used.  If you are like our mom or most people, you have matching guest towels.  With all those towels it can get confusing as to which towel is yours.  Our mom thought it would be helpful to have something to put on the towels that identified which towel belonged to which person.  She wanted something that would be easy to use, big enough to see, and not permanent.  That's when she thought to use clothespins.


They are easy to put on and take off of the towels (even kids can do it), big enough to be seen but not too big that it screams "Look at me," and it's not permanently put on the towels.  This is what she did.  She took enough clothespins (one for each person in the family), painted them (each family has its own color), and wrote each persons name on the front and back of the clothespins.


Simple enough.  So now every time we come for a visit and use bath towels, we hang them to dry, find our clothespin with our name on it, and pin it on.  No more forgetting which towel is yours!  You can leave the clothespins plain with just a name on it.  Or jazz it up with some color!  The choice is yours.


The merrellgirls visit their parents quiet often in the summer (a couple of times a week) to use their pool.  After being out in the hot sun, playing with kids, and swimming you need to freshen up before heading home.  We use our clothespins to keep track of our bath towels for the week.  Can you image the laundry our mom would have to do in one week if we didn't use the clothespin system?  It's a good idea she thought of this!

This is perfect for guest the visit frequently and stay for long visits!  It's also great for beach towels by the pool.  Kids are always in and out of the pool, this way they will use one towel and remember which one is theirs.  So go ahead and try the Bath Towel Savers.  All you need is clothespins, paint (optional), Sharpie marker, towels, and guests!  We hope you like the Bath Towel Savers!